ASME B16.23:2021 pdf free download Cast Copper Alloy Solder Joint Drainage Fittings: DWV
6 SIZE
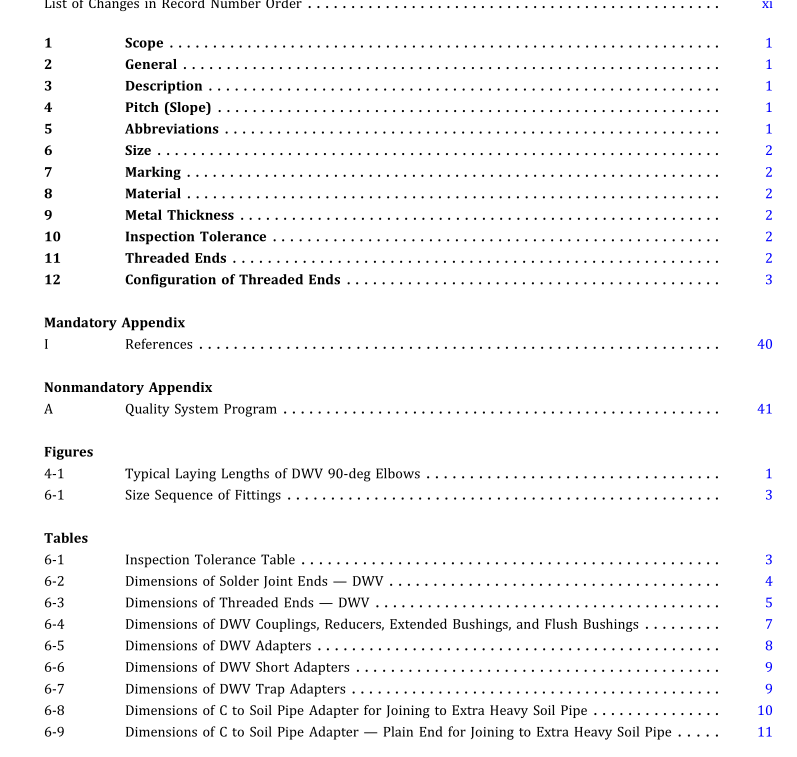
(a) The size of the fittings scheduled in Tables 6-1through 6-56 corresponds to the drainage tube sizeshown in ASTM B306.The size of the threaded ends(except slip joints) corresponds to the nominal pipe size.(b) Fittings are designated by the size of the openings inthe sequence illustrated in Figure 6-1.
7MARKING
(a) Each fitting shall be marked permanently andlegibly with the manufacturer’s name or trademarkand with “DwvT (to indicate Drain Waste Vent).
(b) Vent fittings shall be permanently marked”VENTONLY” (See Tables 6-43 and 6-44) and show the manu-facturer’s name or trademark in accordance with MSsSP-25.
8MATERIAL
Castings shall be copper alloy produced to meet(a) the requirements of ASTM B62 Alloy c83600; orb) the chemical and tensile requirements of ASTMB584 Alloy 83800 or 84400, and in all other respectscomply with the requirements of ASTM B62.
9 METAL THICKNESS
Dimensional variations will occur in the casting process.Pattern equipmentshall be designed to produce the metalthickness given for fittings in Table 6-2.
Any final fitting metal wall thickness less than 90% ofthe thickness given in the table is unacceptable.
10 INSPECTION TOLERANCE
10.1 Convention
For determining conformance with this Standard, theconvention for fixing significant digits where limits(maximum and minimum values) are specified shall beas defined in ASTM E29.This requires that an observedor calculated value be rounded offto the nearestunitin thelast right-hand digit used for expressing the limit. Decimalvalues and tolerances do not imply a particular method ofmeasurement.
10.2 Linear Dimensions DWV fittings covered by this Standard shall conform to the layinglengths specified in Tables 6-4 through 6-56. An inspection tolerance, as shown in Table 6-1, shall be allowed on center-to-shoulder, center-to-threaded end, and shoulder-to-threaded end dimensions on all fittings havinginternal solder(cup) ends; and on center-to-solder end, solder end-to-shoulder, and solder end-to-threaded dimensions on all fittings having external solder (fitting) ends. The largest opening in the fitting governs the toler- ance to be applied to all openings. TheinspectiontoleranceforlayinglengthdimensionsA, B, and C(in Table 6-4) shall be double those shown above, except the minus tolerance applied to couplings; dimen- sion A shall not result in a dimension less than 2.3 mm (0.09 in.).
10.3 Ovality Maximum ovality shall not exceed 1% ofthe maximum diameters shown in Table 6-2.
The average of the maximum and minimum diameters shall be within the dimensions shown in the table. 10.4 Alignment The maximum allowable variations in the regularalign- ment of all openings shall be 5 mm/m (0.06 in./ft).
10.5 Gaging of Solder Joint Ends
(a) Standard Gaging Method ofSolder Joint Ends. The standard method of gaging the diameter tolerances for male and female ends shall be by the use of plain plug and ring gages designed to hold the product within the limits established in Table 6-2.
(b) Optional Gaging Method ofSolder Joint Ends. For gaging the diameter tolerance of male and female ends, the manufacturer may use direct reading instruments instead of ring and plug gages as specified in (a). When gaging the diameters of male and female ends, using direct reading instruments, refer to para.
10.3. 11 THREADED ENDS 11.1 General Threaded ends shall conform to the dimensional requirements contained within Table 6-3. Fitting threads shall be right-hand, conforming to ASME B1.20.1. They shall be taper threads (NPT) except for slip joint ends, which shall have straight pipe threads (NPSM).
11.2 Thread Dimensions All internal threads shall be countersunka distance not less than one-half the pitch of the thread at an angle of approximately 45 deg with the axis of the thread.
ASME B16.23:2021 pdf free download
