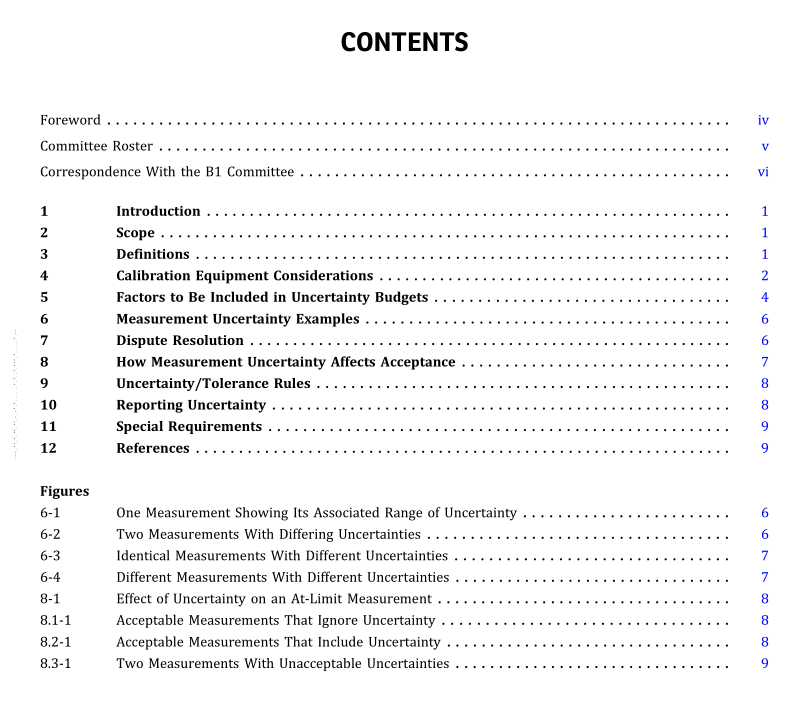
ASME B1.25:2019 pdf download Measurement Uncertainty Factors in the Calibration of Screw Thread Gages
1 INTRODUCTION Everymeasurementcontains an elementofuncertainty with respect to the values obtained compared to the true value of the measured feature. This Standard has been preparedas aguide to the factors thatcontribute to uncer- tainty in the calibration of screw thread gaging devices. The reference section atthe end ofthis Standard provides sources on how to compute uncertainty values.
This Standard is intended to provide the following:
(a) anexplanationofmeasurementuncertaintyandthe factors that contribute to it
(b) characteristics of the equipment required for thread gage calibration
(c) guidance in the application of measurement uncertainty
(d) methods to resolve measurement disputes NOTE: The metric values shown in parentheses are not conversions.
They represent the closest typical metric values for the inch values shown.
2 SCOPE
(a) This Standard notes technical factors that can explain measurement differences between two parties calibrating the same gage.
It is directed to the metrology involved, not acceptance rules or other quality considerations.
(b) While measurementuncertaintyapplies to the calibration ofgages to anystandard, this Standard focuses on gages made to ASME standards only. The calibration of gages necessitates a thorough understanding ofthe standards they were made to because the standards often include required conditions for and corrections to the calibration.
(c) Users ofthis Standard should be aware thatwhile a number of elements for each gage type are listed, inde- pendent calibration laboratories may not include them all in their reports. Agreement should be reached with outside calibration providers as to what elements are included in their various levels of calibration.
3 DEFINITIONS
3.1 General Definitions measurement uncertainty: the amount that a measure- ment of size may differ from the true value of that feature.Everymeasurementcontainsanelementofuncer- taintyexpressedasplusorminusfromthereadingofasize obtained. Uncertaintyvalues determined bythis Standard indicate the true measurement is included within the uncertaintybandwith95%confidence.Withanexpansion of the uncertainty value, the confidence of the true measurement being included could be raised to 99%. It is important to understand that there is no generic uncertainty for a given process.
Two laboratories having identical principal equipment will have different uncer- tainties due to variations in the factors noted in section 5. Often several laboratories report the same or similar values for uncertainty due to rounding of the actual values to the nearest convenient value. For example, 12 μin.mayberoundedto 15 μin.inaconservativebudget. uncertaintybudget: a listing ofall ofthe factors affecting a particular measurement and the mathematical method used to process each one to arrive at a total expanded uncertainty. Each factor is processed to show its common dimensional effect even though it may not be ofdimensional origins, such as temperature or measure- ment force. Also called uncertainty statement.
3.2 Dimensional Calibration Definitions The following terminologyis commonlyused in dimen- sional calibration; however, some terms may refer to thread gages and related devices only: accuracy: an indication of the performance of an instru- ment, the dimensional state ofa master, orthe outcome of a process when compared to specified values. Per JCGM 200:2012, “accuracy” is not a quantity and is not given a numerical quantity value. comparison: a dimensional measurement process in which the unknown size of a gage is compared to the known size of a master, such as a gage-block build-up.
Some instruments, usually referred to as comparators, are designed for this type of shortrange measurement only. Other devices with a long measurement range may be set up in a similar manner for improved precision.
The performance of all devices used in this manner is limited by the uncer- tainty in the calibration of the dimensional master(s) used. cosine error: an error that results when the feature being measured, such as a diameter, is not normal (square) to the axis ofmeasurement. This error may be encountered when plug gages rest on a worktable that cannot be adjusted to offset it. It may also appear in the direct measurement of solid thread ring gages. In both cases, it occurs because either the face or table the gage is
ASME B1.25:2019 pdf free download
