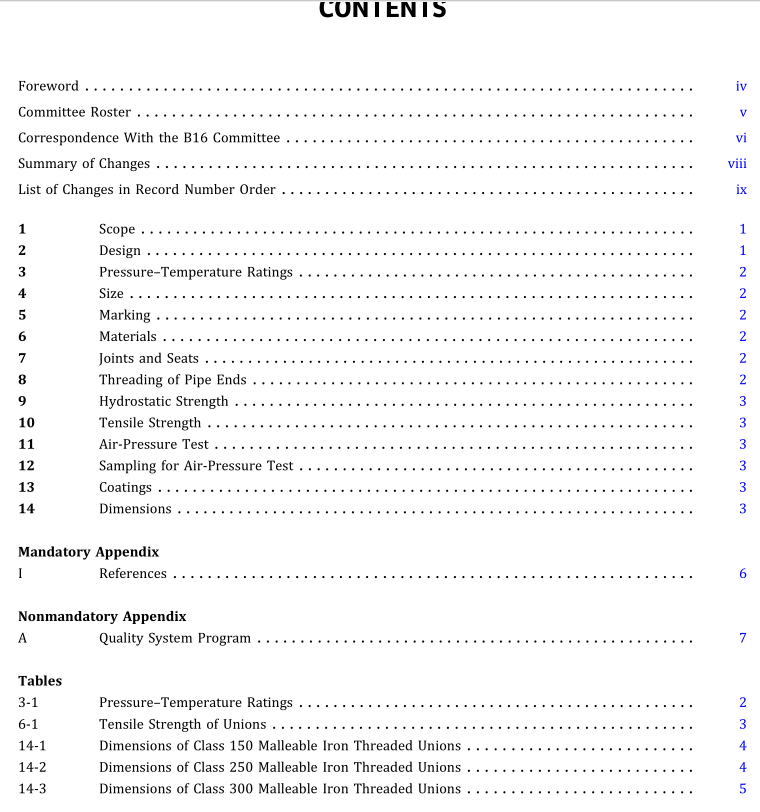
ASME B16.39:2019 pdf download Malleable Iron Threaded Pipe Unions Classes 150, 250, and 300
The threaded ends shall be male or female pipe threads. Theheadorfemale partmaybefurnishedas acoupling, an elbow, or a tee.
3 PRESSURE–TEMPERATURE RATINGS
(a) Pressure–temperature ratings are shown in Table 3-1.
(b) Unions with copper or copper-alloy seats are not intended for use where temperature exceeds 232°C (450°F).
(c) All ratings are independent of the contained fluid andare the maximumpressures atthe tabulated tempera- tures. Intermediate ratings may be obtained by linear interpolation between the temperatures shown.
(d) The temperatures shown for the corresponding pressure rating shall be the material temperature of the pressure-retaining structure. It may be assumed that the material temperature is the same as the fluid temperature. Use of a pressure rating at a material temperature other than that of the contained fluid is the responsibility of the user and subject to the require- ments of any applicable code.
4 SIZE
4.1 Nominal Pipe Size As applied in this Standard, the use of the phrase “nominal pipe size” or the designation NPS followed by a dimensionless number is foridentifyingthe end connec- tion ofunions. The number is not necessarily the same as thefittinginsidediameter. Theconnectingpipedimension can be found in ASME B36.10M.
5 MARKING Unions shall be marked on the nut with the manufac- turer’s name or trademark and nominal pressure class excepton bar stockunions, where marking is impractical. AdditionalmarkingspermittedbyMSSSP-25 maybeused.
6 MATERIALS
(a) The mechanical properties of the malleable iron castings shall be at least equal to those specified in ASTM A197/A197M.
(b) Steel bar stockhaving a yield strength notless than 207 MPa (30 ksi) may be substituted for malleable iron in NPS 1 ∕ 8 unions.
(c) Insert rings may be of suitable copper or copper alloy. Where copper-alloy seats are furnished, either the head or tail part of unions produced from bar stock may be solid copper alloy. Such parts must meet the tensile strength requirements listed in Table 6-1.
7 JOINTS AND SEATS Inserts shall be secured into the ends permanentlywith no signs of cracking. Inserted seat rings shall be of suffi- cient width to allow ample bearing for the seating of the male end.
8 THREADING OF PIPE ENDS
8.1 Types of Threads Pipe ends ofhead and tail parts shall be threaded with taper pipe threads (ASME B1.20.1) except that NPS 1 ∕ 8 unions made from bar stock may have National Pipe Straight Coupling (NPSC) internal straight pipe threads.
8.2 Types of Threads All fittings with internal threads shall be threaded with taper pipe threads per ASME B1.20.1. Variations in threading shall be limited to one turn large or one turn small from the gaging notch when using working gages. The reference point for gaging is the starting end of the fitting, provided the chamfer does not exceed the major diameter of the internal thread. When a chamfer on the internal thread exceeds this limit, the reference point becomes the last thread scratch on the chamfer cone. 9 HYDROSTATIC STRENGTH Assembled unions shall be capable of withstanding, without rupture or leakage through the shell or at the union joint, an internal hydrostatic pressure of five times the cold 66°C (150°F) pressure rating for 1 min.
10 TENSILE STRENGTH
(a) Assembled unions shall be capable ofwithstanding without rupture the tensile loads shown in Table 6-1.
(b) Tests shall be conducted by attaching threaded steel bars or pipe to each end of the union using the pipe threads. Bars or pipe are to be secured in a tensile testing machine. Load shall be increased at a uniform rate until the tensile load is attained.
11 AIR-PRESSURE TEST Assembled unions selected in accordance with section 12 shall be tested with air at a minimum pressure of 2.8 bar (40 psi).
12 SAMPLING FOR AIR-PRESSURE TEST A random sample of unions representative of the productionlotshallbesubmittedfortestinginaccordance with section 11. The average outgoing quality level (AOQL), as defined in ANSI/ASQ Z1.4, of the established acceptable samplingplans used shall notexceed 2%. Alot, for purposes ofthis Standard, is defined as the number of unions of the same size, design, and pressure rating submitted for testing at any one time.
13 COATINGS
13.1 Malleable Iron Unions When malleable iron unions are zinc coated, they shall be hot dipped in accordance with ASTM A153/A153M or have an electrodeposited zinc coating conforming to ASTM B633, Type 1, Service Condition 4. Hot-dipped coat- ings shallbe aminimumthickness of86 m(0.0034in.) and appliedpriorto threading.Electrodepositedzincshallbea minimum thickness of 25 µm (0.001 in.) and may be applied either before or after threading.
13.2 Steel Unions NPS 1 ∕ 8 unions made from steel bar, per para. 6(b), may be either uncoated or have an electrodeposited zinc coating conforming to ASTM B633, Type 1, Service Condi- tion 4. The electrodeposited zinc coatings may be applied either before or after threading.
ASME B16.39:2019 pdf free download
